Showing posts with label Love. Show all posts

Friday, July 4, 2014

Happy 5th Birthday, Kiani!


Today is the 4th of July and people all over the USA will be honoring the birth of this country... but our family has another reason to celebrate. Because our beautiful daughter Kiani was born today too! She's quite the little firecracker ;) Watching our baby girl grow into the smart, loving, and fiesty child that we know today has been such an adventure! She means the world to me...

When I became a parent I realized how important it is to love unconditionally, cherish each moment, and to celebrate life. Everyday I thank God for our blessings. And today our family gives thanks to all of the brave people who fight for our country, so that we can live in this beautiful place we call home.

Happy Independence Day, America!
Have a safe and fun holiday weekend with your friends and loved ones.


...and Happy Birthday, Kiani!
We love you to the moon and back.

Tonight... all of the fireworks in the sky burn for you.

Thursday, October 10, 2013

Smashbook: 13 Years of Love


Since my obsession with Project Life has taken up much of my time this year, I haven't really had the chance to work in any of my other books. A while back I decided to start sharing some old layouts that I created last year in my pretty pink SMASH* book here on my blog. Today's post is very close to my heart because tomorrow marks our 14 year anniversary. So I thought I would share the spread I created last year in honor of our special day...

I created this spread when I was fairly new to SMASH*ing, but I've been using this style of documenting life for as long as I can remember. I still have all of the altered composition books from my childhood filled with old photographs & photobooth pics, cutouts from magazines, doodles and drawings, journaling, and even little bits and pieces of ephemera that I didn't have the heart to throw away. I guess you can say that I'm a natural SMASH*er. Seeing how my style has evolved through this creative outlet many years later makes me incredibly happy.

Smashbook: 13 Years of Love | Full Spread

Our endless love and the memories we've shared over the last decade was the inspiration for this spread. I started out by flipping through my book to find the perfect set of pages. My love of the color pink also served as inspiration and when I came across these pretty pink patterned papers, I knew they were the ones. I took it a step further and used some love-themed stamps and colorful ink to create another layer for my background.

Smashbook: 13 Years of Love | Left Page

With some double-sided paper scraps and pink & white twine, I made a lovely pennant banner. Then I used a metallic silver paint pen and black zig marker to write the year. Next, I scoured my collection of magazine clippings and found a perfect "October" for this spread. The best part of creating these pages was digging through 10+ years of our "couple" pics, but choosing my favorites had to be the hardest.

For embellishments I used a Dear Lizzy chipboard Polaroid frame, to which I added the "heart and soul" rub-on, an Amy Tangerine cardstock camera, a LOVE element [gifted from a friend], pink argyle & love grid washi tape, a SMASH* roller date stamp, and a variety of tiny alphabet stickers.

Smashbook: 13 Years of Love | Right Page

Here I added more of our favorite "couple" pics. For embellishments I used another strip of pink argyle washi tape, some Basic Grey alphabet stickers, pink glitter cardstock letters by Colorbok, and a cardstock heart [gifted to me by a friend]. This spread wouldn't be complete without a pocket full of goodies...

Smashbook: A Pocket Full of Love

Handmade pockets are one of my favorite elements to add to my books. And my Smashbook is full of them! I love creating my own because it's such a simple way to add a personal touch to your pages. You can choose any paper you like depending on your mood or theme, and easily customize the size of the pocket. For this one, I used pretty pink paper from Amy Tangerine's Sketchbook line, and found a printable label from my stash that had the perfect sentiment. The funnest part about having a pocket is finding stuff to fill it with...

Smashbook: How I SMASH* with Journal Cards

I love using Project Life journal and filler cards in my SMASH* book. I print them a bit smaller than normal and stuff my handmade pockets with 'em! The ones I chose for this spread are love themed, of course. I used a journal card to document the day, a "This is Why I Love You" prompt card, a filler card which I added a small photobooth sticker of us, a lovely quote card, and a sweet card that holds an instagram photo of our daughter.

Our little one loves flipping through my SMASH* book and interacting with all of the different elements. So whenever I include a pocket, I always add washi tape tabs to the top of the journal cards. It makes it much easier for little hands to pull out the cards and deters the munchkin from tearing my pockets apart trying to get them out!

Well that's all I have for you today! I hope you enjoyed my post and leave here feeling inspired to create something beautiful in your book :) Want to take a peek at the pages in my pretty pink SMASH* book? You can find it here. Looking for the fun free printables I used in this spread? Feel free to browse my "SMASH* & PL" or "Printables/Templates" pinboards on Pinterest. You'll find links to hundreds of freebies, DIYs, How-To's, ideas, and inspiration for everything SMASH* and Project Life. Be sure to follow those boards because I find new stuff daily!

You can stay updated on my recent posts, projects, and photos by following me on instagram, or by "liking" my new fan page on Facebook. So why not head over there now and show some love...

Do you SMASH*? What inspires you? Any thoughts, questions, or comments about this post? Please let me know. Your feedback is always welcome and much appreciated!

Thanks for stopping by!

Monday, September 23, 2013

Filofax: Week 38


Hello. I hope you had a lovely weekend! Mine was pretty fabulous :) I received some early anniversary gifts from the Hubby. After all these years, he still surprises me... more to come on that. Today I'll be sharing my most recent completed layout in my pink [personal] Domino, and a sneak peek at what I've been working on.

I have to say that I love using my Filofax to stay organized and on top of every aspect of my life. I am one to write everything down (as you can obviously see), but nothing is set in stone with me. Life isn't perfect, and plans change. My Filo easily adjusts to life. Nothing some correction tape or post-its and sticky flags can't fix.

Filofax: Week 38 | Full Spread

With the help of my color-coding system, I'm able to keep track of the various things I have going on in my life. Each color represents a different "subject." I really love playing around with different fonts and handwriting when adding specific details. I also like to hand-draw my checkboxes.

I don't embellish my pages too much beforehand, since I want to make sure that I have enough room for the written details. But I do have to add washi tape before diving into any week. For this layout I used some fun and cheerful yellow designs. The multi-colored chevron print I picked up for $.97/roll at Walmart, and the diagonal stripe came from an Up&Up set from Target [$3- on clearance]. I even used some Stickerdoodles [owl and lime] and Hello Kitty [sun & cloud] stickers to finish the spread. An Up&Up magnetic clip marks my calendars.

The WO2P inserts I'm using were created by my girl Cathy V. of Paper Addict. You can download it here. I love these pages because they give me more than enough room to cram in all of my notes, but most of all because they start on Sunday, and the weekend "sections" are bigger. Perfect!

Filofax: A Sneak Peek at My Current Pages

I told you earlier that the hubby surprised me with some early anniversary gifts... can't believe he actually bought off my wishlist! After 14 years together... he still totally gets me. Love him! I have a new addition :) Say hello to my florescent pink A5 Original....

Filofax: Playing with My New A5 & Fun Supplies

I'll be sharing more of my new A5 in future posts, so check back often! You can find all of my completed Filofax pages here. If you're looking for more planner inspiration, check out my "Filofax Addict" pinboard on Pinterest!

Stay updated on my recent posts, projects, and photos by following me on instagram, or by "liking" my new fan page on Facebook. So why not head over there now and show some love...

Are you a planner or Filofax addict? Which one is your fave? Currently using? Any thoughts, questions, or comments about this post? Please let me know. Your feedback is always welcome and much appreciated!

Thanks for stopping by!

Wednesday, September 18, 2013

Smashbook: I Heart Washi


Hello! I hope you're having a great week :) Mine? It's been very productive! Helping my family recuperate from a cold bug this past week, has also given me lots of free time at home to work in my books. Yesterday I showed my up-to-date layouts in my Project Life album, and today I'm excited to share a new spread in my pretty pink SMASH* book!

I haven't been able to SMASH* much this year because of my obsession with Project Life and staying current in that album. Now that I'm all caught up, I was finally able to create a new spread in my book! It felt so good to SMASH* again. I didn't lose my mojo afterall! I just needed some extra me-time...

Creating a "Washi Tape" spread in my pretty pink book has been on my to-do list for over a year. I really can't believe I waited this long to do it. It was super simple to make... but has a huge impact! And it only required TWO supplies! You can play around with different tapes in your collection, and have some fun with cool thickers. Even the way you layout your pages has endless possiblities...

SMASH* Book: I Heart Washi
I started out by choosing pages in my book that had a simple and basic design and pattern. You don't want anything too detailed or with too much color. Paper washi tape is semi-transparent, so you don't want to detract from the designs on your tape. The pages I used have a simple and small pink and white design, hardly noticeable through the tape.

I guess it's kind of a good thing that I waited a while to start this project. Over the last year I was able build a wonderful collection of washi, paper, and deco tape. I loved digging through my storage bin for some new designs, my favorite rolls, and even samples gifted to me. There were so many rolls to choose from that I didn't have enough room to use all of them! No problem for me, I wouldn't mind doing another spread like this in my next book :)

When it came to using the different tapes to lay out the design, I just played around with it. The best thing about washi tape is that it isn't permanent! If you don't like the placement of a particular tape, just take it off and move it wherever. Mix up different colors, patterns, and widths of your tape! I also varied the length of my tape strips, and didn't use a scissors because I like the look of torn tape. You can even see that some of the tapes overlap. It very much reminds me of a quilt.

SMASH* Book: I Heart Washi & Thickers

I couldn't leave this spread as just tape. It needed a title. So I rummaged through my stash of Thickers and found one of my favorites. "Umbrella." I used these puffy stickers to spell "washi." I purchased them over a year ago at Big Lots, and have only used it once before now. The font is the largest of all my thickers [it's HUGE!], so it isn't desirable on my Project Life cards. But they are great for my double-page SMASH* Book spreads. And they're the perfect alphabet stickers for this layout! I also used another one of my larger alphas for the "I."  The black heart is a cutout.

A majority of these tapes came from two of my favorite online shops: Paper Addict and The Beary Scrap. The owners Cathy and Kimm are amazing! I've known both for over a year, and have been a loyal customer since Day 1. Check them out!

I've also snagged some fabulous designs online from Downtown Tape. Walmart has great tape for $.97/roll, visit Michael's for their Recollections brand [lots of variety], JoAnne's carries cute little Studio G packages for $.99, Target stocks Scotch and SMASH*, and even Big Lots and Tuesday Morning have sets of designer tapes. I was lucky enough to pick up a Cosmo Cricket "Hello" set from T.M. and a set of Elmer's designer tape at B.L., for only $3- each.

SMASH* Book: I Heart Washi | Close Up
I really love the way this spread came together... It looks fabulous! I'm so happy to be SMASHing again :) I hope you enjoyed today's post and leave here feeling inspired to create something beautiful in your book! If you would like to take a peek at my pretty pink SMASH* Book, you can find it here. If you're looking for more SMASH* inspiration, check out my "SMASH* & PL" pinboard on Pinterest. You'll find links to hundreds of DIYs, free printables, How-To's, ideas, tips, and inspiration for everything SMASH*. Be sure to follow that board because I find new stuff daily!

You also can stay updated on my recent posts, projects, and photos by following me on instagram, and by "liking" my new fan page on Facebook. So why not head over there now and show some love...

Do you SMASH*? Have you made a spread like this yet? I'd love to see it! Any thoughts, questions, or comments about this post? Please let me know. Your feedback is always welcome and much appreciated!

Thanks for stopping by!

Wednesday, July 31, 2013

Smashbook: Ohana Love


Happy Wednesday! It's time for another post about an old spread in my pretty pink Smashbook. I've decided to share some of my old creations since I haven't had much time to SMASH* this year, due to Project Life. 

When it comes to our family, there is nothing more important than ohana. And this Summer, we've done a lot of traveling back and forth to visit our loved ones down in Portland. I thought I would share an old spread about a visit from our family last summer. This will give me a chance to document all the new trips our family takes this season. I already have some ideas. So when I'm all caught up with PL, have extra time to myself, and get my SMASH* mojo back, I can finally do another spread!

"Ohana Love" - Left Side

These pages were inspired by my family, of course. And I knew I wanted to keep it pretty simple. So I flipped through my book for pages that weren't too busy because I wanted to add rub-ons and do some stamping. The color and design of this set of pages worked with the color scheme of my elements, as well as the photos.

For the left page, I started by picking out some instagram photos from our weekend. I had a few of them I wanted to include, so it made sense to print them smaller [wallet-size]. I arranged them on my page and added a printable journal spot, which I used as a frame for one of the photos. For journaling, I wrote directly on the page and I also used scraps of Hawaiian themed scrapbook paper as journal tags.

My embellishments for the page include a pretty cardstock flower [by K&Company from a set that I received in a happy mail package from a friend], a handmade instagram camera [created by my girl Cathy V.], and some fun alphabet stickers [by K&Company called "Animal Tales"] for the title. Super sweet and simple, and doesn't take away from the story of my photos.

"Ohana Love" - Right Page

I had lots of fun with the right side and incorporated a few different elements. Again, I laid everything out first to make sure it all fit and that everything was easily visible once put together. I was really excited to finally use an "Ohana" quote tag that I received from a friend in a happy mail package. [She knew how much I love Lilo & Stitch, and my family ;)] It's the perfect addition to these pages! I also added an old family photo right next to the tag.

"Ohana Love" - A Repurposed Window Envelope Turned Pocket

I really wanted to include an idea inspired by Pinterest to this page. I'm all for re-purposing and recycling, so when I came across a pin about reusing an old window envelope as a pocket, I had to give it a try! It's the perfect little pocket to hold some old family photos, a "guest check" (used as a journal card) talking about our family lunch together at a local restaurant, and the drink tickets from lunch. I put everything inside the pocket first and made sure that the placement was correct before I adhered it to the page. I didn't want any of the ephemera to block the photo at the top.

"Ohana Love" - A Journal Card with Washi Tape Used as a Photo Log

Sometimes I forget the details of specific photos, and I don't like writing on the back of them. Since these pictures are so old, I thought I would create a "photo log" to stick in the pocket to help me remember. I added washi tabs directly to each photo, using a different design for each one. The tabs serve two purposes. First off, it makes it much easier to pull the photos out of the pocket. This way, my 4-year-old (who loves flipping through my book and interacting with the different elements) doesn't tear the pocket apart trying to dig things out. Secondly, the different designs of washi on each tab is used to mark specifics of each photo on my "photo log." I just tore off a tiny strip of each design, added it to a small journal card, and wrote down the details.

"Ohana Love" - Full Spread

To finish off this spread I used some 'memories' and 'travel' themed rub-on's, as well as a pretty flower to fill an empty space. But this spread wouldn't be complete without an "aloha" sentiment from a favorite rubber stamp. I really love the way these pages turned out! It represents my culture and everything important to me. It's full of memories, both old and new. It's my way of SMASH*ing....

I really hope you enjoyed today's post and leave here feeling inspired to create something beautiful in your book. Would you like to take a peek into my pretty pink Smashbook? You can find it here. Looking for more SMASH*ing inspiration? Check out my "Smash* & PL" pinboard on Pinterest. Along with inspiration, you'll find hundreds of links to free printables, DIY's, How-To's, tips, and ideas for everything SMASH*. Be sure to follow that board because I find new stuff daily!

You can also stay updated on my recent posts and projects via instagram, as well as with a "like" on my new fan page on Facebook. So why not head over there now and show some love...

Are you a SMASH*er? What is your favorite subject to document? Any thoughts, questions, or comments about this post? Feel free to drop me a line. Your feedback is always welcome and much appreciated.

Mahalo for stopping by!

Thursday, July 4, 2013

Smashbook: Hello Kiani


Happy 4th of July!

Today is doubly special for our family... it's also the day I gave birth to our baby girl. And this year she turned 4 years old! Ever since the day my daughter was born, she's always been such an inspiration to me. As the subject of many photographs, Project Life layouts, and Smash* book spreads... I never tire of the creativity she gives me.

With today being her birthday, I thought it would be nice to share a spread with you from my Pretty Pink book, that I created last summer in honor of her. Whenever I look at this, it puts a smile on my face. Seeing how innocent, and fun, and angelic she is makes me realize how blessed we are. Watching her grow up through the pages of my book is simply amazing....


First, I started out by thumbing through my book to find the best pages that represent my daughter. She's a girly girl, and like me, she has a love for the color pink. When I saw these pretty pink grid pages with butterflies and dictionary snippets of the words "Delight, Cheer, and Joy," I knew this spread was perfect.

I used my homemade pink glimmer mist to spritz a few sections of the pages. [Click for my Glimmer Mist DIY.] It adds a subtle touch of color to the otherwise white background. Next came the fun part of digging through my stack of instagram photos. I chose ones with pops of color as well as images that captured her youthfulness.


Another fun part was scouring through my stash for cute printables. I found lots of great pink stuff! A Hello tag, a potty girl and smile ticket, a sweet card, a lined tag with a heart, and even some scrabble letter tiles. All of the ones I just mentioned were found on the internet and downloaded for free. The adorable instagram camera was given to me by a friend, and the Hello Kitty was cut out from the packaging of my daughter's scrapbook kit.

I also made a bunting banner using complementing scraps of pretty paper with pink and white twine. It was super simple and made good use of my scraps. I found even more embellishments like a hot pink floral diecut, and some fun flair buttons that were the perfect addition to these pages.


I finished off this spread with a pink angel wings tag (which I wrote her birth date on), and another printable tag that I added some special sentiments to and tied off with more pink and white twine. These pages wouldn't be complete without some thickers and tiny alphabet stickers... in pink, of course!


I absolutely love how these pages came together. It's definitely one of my favorite spreads in my Pretty Pink Smash* book. My daughter loves looking at it too! I can't wait to make more pages about her this summer, and seeing how much she has changed since last year. Being able to document her growth and interests over the coming years, to be later looked back on in the future, is such a wonderful experience for us all.

Life is Good! 


I hope you enjoyed today's post! It was pretty special and I was so happy to share it with you. Want to take a peek into my Pretty Pink book? You can find it here. Wanna stay updated on my recent posts and projects? Be sure to "like" my new fan page on Facebook! Interested in the free printables I used for this spread? You can find them on my "Smash* & PL" or "Printables/Templates" pinboards on Pinterest. Along with printables, you'll find links to hundreds of other DIYs, How-To's, tips, ideas, and inspiration for everything Smash* and Project Life! Check it out...

Are you a Smash*er? How much do you love smash*ing about your little ones? Any thoughts, questions, or comments about this post? Feel free to drop me a line. Your feedback is always welcome and much appreciated!

Mahalo for stopping!

Happy 4th Birthday Kiani!


Four years ago today we were blessed with a perfect baby girl. Over the years it's been a roller coaster ride learning to live with a little person who has so much spunk, such a fiery personality, and many other qualities that are so much like her mommy and daddy ;) But in the end, it's all worth it.... because she's the best thing that has ever happened to us. Without her we wouldn't feel complete. She's our world. Our angel. And today just shows how fast she's growing up! So from here on out, we'll continue to cherish every waking moment we have together...

Today is your day Kiani, and tonight all the fireworks in the sky burn for you. 
We love you to the moon and back. 
Happy 4th Birthday Baby Girl <3


Happy Independence Day Everyone! 
Be Safe and May God Bless America.

Sunday, May 12, 2013

Smashbook: Prompts & Doodles

Aloha! I would like to send Mother's Day wishes to all of the wonderful Mommies out there in the world. We are all someone's "hero." I hope you had a blessed day ♥ It's been a long time since I smash*ed in my pretty pink book. And feeling inspired by the love from today, I finally picked it back up and created something beautiful again.


As you can see, I spent my much needed "Me Time" during this Mother's Day weekend with writing utensils in hand. I don't know what urged me to turn the original "Top 10" prompt into a full spread, complete with a "Currently"  list and Doodles & Zentangles. As I worked, I kept having flashbacks from my high school days. Seeing notebook after notebook full of colorful journal entries and drawings. It's amazing to see how much my style has been consistent but yet evolved to what it is now.

Believe it or not, I was suffering from a KILLER migraine this whole weekend! I had to find something to get that awful pain out of my head... I turned to my SMASH* book. I remembered how relaxing and peaceful my last Zentangle session was. [See my "Zentangle Fairytale" post.] So I knew it was the perfect remedy now. I gathered my supplies, and let my thoughts and ideas flow... 


I flipped through the book searching for the perfect pages. I came across a set of lined "notebook" paper with a "Top Ten" prompt on the left side. If you know me and follow my blog, you know that I love writing and penmanship. I take full advantage of the chance to play around with different fonts. It's a passionate detail that I love adding to my books! Always starting out with pencil first, I freehand the various fonts using the lines as a guide. Then I go over the pencil using my black zig pen/marker, and erase all of the pencil marks. I usually make one more pass with the black pen to finish it off. I decided to leave each "fave" black since there was already so much color from the numbers and my doodles.


I guess it was only appropriate to turn this fully lined paper into my "Currently" list. I started out with Amy Tangerine "Journal" thickers for the title. The simple and slim letters fit perfectly into the space next to the (date/time/place) label already there. I didn't want to use only my writing on this page though. So I used some large Hero Arts wooden alphabet stamps for the prompts. It's okay to have the letters and words look a little imperfect. I think it totally compliments the randomness of the doodles and zentangles :) I added some sparkle with journaling using my metallic purple sakura gelly roll pen.... *Don't mind the little white "splotches"...it's white-out. I had to fix a couple of things because my toddler kept bumping me. The joys of "Motherhood." ;)

I left the best part for last! As far as the doodling and zentangles go, that was all done freehand too.  After I knew how much space I had, I used a mechanical pencil and just started drawing. Working in sections and using a mixture of fun shapes and designs paired with simple repetitive patterns....my work came to life. I outlined each section with the black pen twice and erased all of the pencil marks. I started filling in the  zentagles with touches of black, and added pops of color using a set of really chunky art pencils with different colors blended into each one. I added the different elements and designs as I went, slowly filling in the empty spaces. 


I love the way it turned out! I really hope you enjoyed this post and feel inspired to create your own Zentangle pages in your books. Once you get the hang of it, it only becomes more enjoyable. I like how incredibly relaxing and peaceful it is. Did I mention it also cured my 3-day migraine? Yup. It honestly did. I had nothing to focus on but my art and the paper in front of me.

Interested in trying another fun SMASH* book entry? How about a "100 Things I Love" spread? I even provided a list I made to help get you started on yours. Click here for my "100 Things" post. Wanna take a peek into my pretty pink book? You can find it here. Looking for more SMASH* inspiration? Check out my "SMASH* & PL" pinboard on Pinterest. It's full of hundreds of ideas, inspiration, DIY's, and printables. I know you'll find something you like! Want to stay updated on my recent posts and projects? Be sure to "like" my new fan page on Facebook

Do you SMASH*? Have you tried Zentangles yet? What do you think about it? Any thoughts, questions, or comments about this post? Let me know. Your feedback is always welcome and much appreciated.

Thanks you for stopping by!

Monday, April 29, 2013

Smashbook: Zentangle Fairytale


Today I'm featuring another spread from my Pretty Pink Smashbook. What I love most about SMASHing is that your book can be anything you want it to be... because there are no rules! And I use mine in so many different ways. Some of the pages resemble a scrapbook with lots of photos, captions and embellishments. Other spreads are journal-like with mostly writing and little or no embellishments. I even love to use it as an art journal with mixed-media creations, collages, and in this case Zentangles. It's so cool flipping through my book and seeing all of the different spreads... each one capturing what I'm feeling at that moment.

I was a newbie to SMASHing when I first made this spread 9 months ago. As a matter of fact, this was actually the 3rd spread I ever created, and my very first Zentangle pages. Although it looks complicated, it's not. All you are doing is repeating simple patterns. If you're a doodler like myself, you should pick it up easily. But anyone can do it, all it takes is some practice.

I choose to do this Zentangle in a Love theme because I love SMASHing about Love. This was just another way for me to show it. I think the Pretty Pink book is the best book to use when it comes to the subject of love. It's chock full of sweet, romantic pages with touches of pink and "lovely" little details.


I flipped through the whole book to find the perfect background for my Zentangle art. The pages I chose were covered in roses and had a large "Memo" label on the left page and a smaller "Forget Me Not" tag on the right. These pages couldn't have been more perfect for what I needed...it totally screamed "Love"!

Inspired by the gorgeous images and patterns on the internet, I started out by drawing my Zentangles freehand with pencil first because I knew I was going to make mistakes. (Especially with my 3-year old sitting right next to me bumping me every 5 minutes!) And from there, I just let the pencil flow...

Then I went over the whole thing with a black zig pen and erased all of the pencil marks. I added pops of color using a red colored pencil and with a black calligraphy pen, I wrote a favorite quote and filled in the "Memo" label with a special sentiment. I finished off the spread with a couple of photobooth pics taken during that moment in time, over 14 years ago.


I know that another Zentangle spread will be going into my book in the near future. It may have taken me a while to do these pages (thanks in part to my toddler), but it was all worth it. Those few hours were incredibly relaxing and fun at the same time. It's definitely a great way to wind down after a long and hectic week.... you should try it sometime :)

[*Update 5/12/2013: You can find my recent Zentangle spread here.]

Would you like to take a peek at my Pretty Pink SMASH* book? You can find it here. Are you looking for inspiration to fill your books? Be sure to check out my "SMASH* & PL" pinboard on Pinterest. Wanna stay updated on my recent posts and projects? Be sure to "like" my new fan page on Facebook!

Are you a SMASHer? Have you tried a Zentangle spread yet? Any thoughts, questions, or comments about this post? Feel free to drop me a line. Your feedback is always welcome and much appreciated.

Mahalo for stopping by!

Thursday, April 18, 2013

Smashbook: Our Love Song


Over time, I'm slowly going to showcase some of the spreads I've done in my SMASH* books here on my blog. So far, I've only been able to share my "100 Things I Love" spread, which as of today, is one of my most popular posts. I think the reason so many people like it, and refer to it often, is because I included a list [I made] to help anyone get started on creating their own list of "100 Things You Love." Be sure to check it out... it may be something you want to include in your book.

Today, I'm sharing another special spread in my Pretty Pink book.  If you know me and have seen the pages of this book, you know that I love smashing about "Love." It's one of my favorite subjects! Going 14 years into a relationship with my best friend has given me lots of inspiration for Smash* pages. I thought it was very fitting to include a page in this book with one of our favorite love songs. Believe me, it was hard to choose one song from a list we've developed over a decade of being together!

"Our Song: Forever" -- Smash*ed Nov. 13, 2012

The thing I love about pages like this is that these particular spreads are so versatile that you can include them in all of your books. I can choose a totally different song, embellish it a completely different way, and create it on brand new pages of each of my different Smash* books! Since every Smash* book is different and special in its own way, you never feel like your spreads look exactly the same in each book... unless you plan it out that way ;)

Since I love penmanship and handwriting, I'm never afraid to write on the pages of my books. It's one of my favorite things to do! To make sure that element will look its best, I choose a spread of pages that are lined in some way. The one I used here is a grid spread, perfect for writing. It also had a touch of pink from the flower on the left page, and a cute calendar on the bottom right. It was a wonderful jumping off point to get creative... 


....This set of pages screamed "love." So, I tapped into my love for the color pink with all of my alphabet stickers, the glitter gel pen used to write the lyrics of my song, and the tags and pockets I made to embellish the rest of this spread. It only made sense to use these pages to document "Our Love Song." 

You can easily customize a spread like this for your book. All you need is a song (with lyrics), "lined" pages in your Smash* book, a pen, pencil, and eraser, and some embellishments. I went ahead and added a pocket to hold a journal card that talks about the song and what it means to me. I thought it was great addition and filled up that large blank spot well. Paper scraps were used to create the pocket and banner. The spread wouldn't be complete without a photo.....

*TIP: When doing any type of writing in your books, write first (lightly) in pencil. Then go over your writing with your choice of pen, and thoroughly erase all of the pencil marks. It may be a time-consuming process, but it's much better than ruining the pages of your book because you spelled something wrong or needed more space for your entry!

You can find more pages of my Smashbooks in the tab labeled "Smashbook" at the top of my blog. I also have pics of some of my pages on my "My Books: SMASH* & PL" pinboard on Pinterest. If you are looking for even more inspiration, be sure to check out my "SMASH* & PL" board on Pinterest too! It's full of hundreds of ideas and inspiration, DIYs, and printables for everything Project Life, SMASH*, Daybooks, and art journals!

Wanna stay updated on my recent posts and projects? Be sure to "like" my new fan page on Facebook!

Do you SMASH*? Are you feeling inspired to create a spread like this in your book? Blogging about it? Link me up! I would love to see it :) Any thoughts, questions, or comments about this post? Feel free to drop me a line. Your feedback is always welcome and much appreciated!

Mahalo for stopping by!

Tuesday, March 5, 2013

Daybook of Love: Weeks 3 - 4


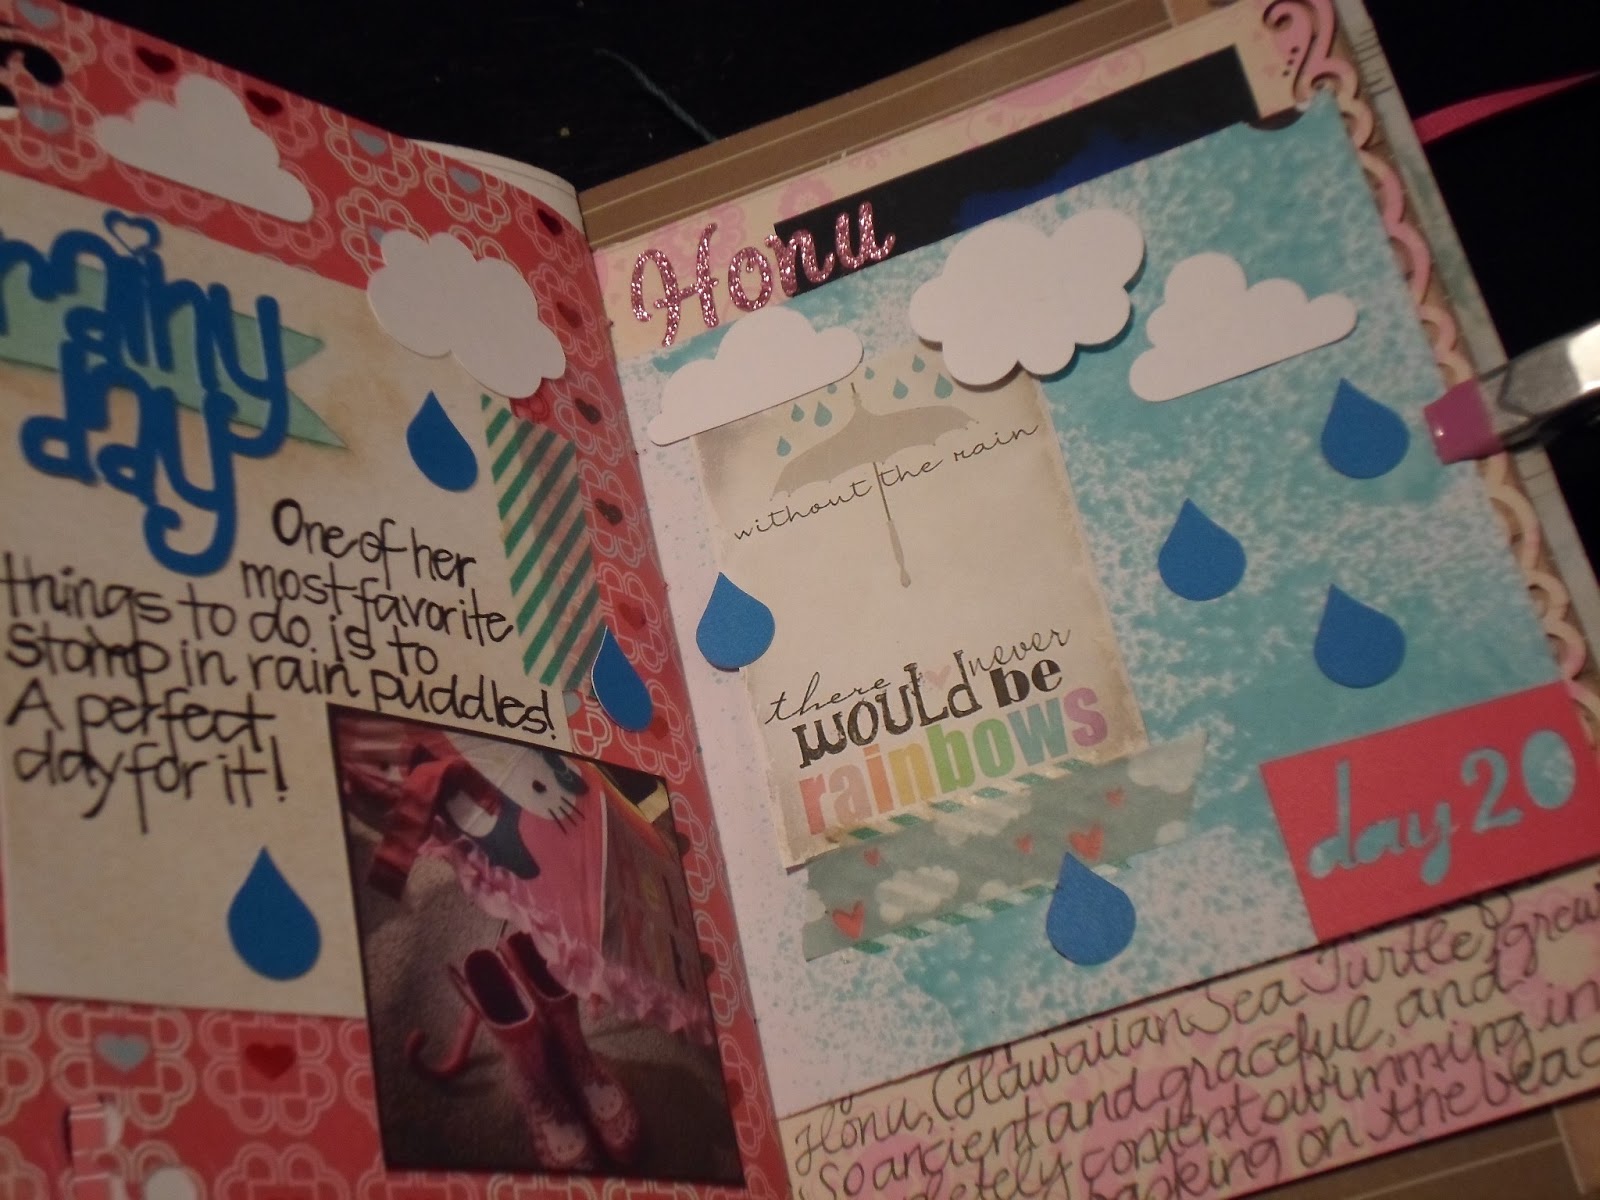
For "The Month of Love", I used a handmade daybook to document each and every day. It's practically bursting at the seams with memories we shared together, as well as things I love. In the end, it turned out fabulous... I love how super chunky it is!

Last month, I posted Days 1 -14 of my February Daily Daybook. And today, I'm so happy to finally share the remaining pages with you! I had so much fun creating this book, and I love flipping through it to see all of my memories from the month right there in one place! Daybooks really are a great way to document everyday life...

Life Documented
Days 15 to 28

Day 15: Chick Flick Marathon
Day 16: Crafty
Day 17: We Love Sundays
Day 18: Sweet Treats
Day 19: My Cameo Named Candy
Day 20: Rainy Day
Day 21: Honu Love
Day 22: Me + You = Love
Day 23: "Currently"
Day 24: Project Life
Day 25 (Part 1): Love Letters
Day 25 (Part 2): My VDay Card 
Day 26: The Greatest Gift
Day 27: Mini Instax Love
Day 28: Words of Wisdom
Related Posts Plugin for WordPress, Blogger...
Pin It button on image hover