Tuesday, April 16, 2013

Printables: April


Hi everyone! Hope you're having a great week so far! If you are familiar with my blog, you obviously know how much of a paper addict I am. And that addiction includes Printables! If you are looking for tips and tricks involving free printables, I encourage you to read this blogpost I wrote. It talks about lots of different things I've learned over the last year to help make the whole "printables process" easier on the budget. (Believe me, I do LOTS of printing at home, and now it is something I can definitely continue because the system works for me.) Check it out...

You can find the following PL/SMASH* printables, along with hundreds of others on either my "Printables/Templates" or "SMASH & PL" pinboards on Pinterest. Take a peek... I'm sure you'll find something you love or haven't found yet ;)

I like to do my printables in big batches once every month. Throughout the month, I download and save designs I like. When it's time to print, I just open the file on my desktop and print them out. Each month I print a batch, use the ones I like, and the ones I don't use get added to my collection. When it's time for the next batch, I print up the designs I've used up (that I love) along with any new designs I find. It's a simple way to build up your collection without getting overhelmed and spending way too much on ink and paper. It's also a great way to start a budget with your ink. *The color cartridge used to print this batch of printables plus the last 2 months, along with all of my PL photos, and vacation paperwork, lasted me close to 3 months! 

Here is my most recent batch of printables....


This month I kept an eye out for calendar cards, filler cards, 3x4 journalers & fillers, and anything to do with family or traveling. Stuff I'll be needing for the next couple weeks of Project Life when documenting our vacation and the upcoming months. I also found some more great cutouts like the tickets and cameras.

Next I want to feature a couple of my favorite finds for this month. I think you'll really like them! What I love about this first group is that they are actually a collection of 3 different sets by IBPB. Two of the sets are black and white, and one is B&W with a touch of Tiffany Blue. There are 3x4 cards with geometric patterns (which I printed on both white and Kraft cardstock for two totally different looks), 3x4 B&W filler cards with word art chalkboard designs, and a set of different sized cards with black, white, and Tiffany blue designs. I love the way this collection looks together! So fabulous...especially with the touch of Kraft paper :)

PL Cards from IBPB --------> Download Here at IBPB's Blog

This last set is actually a collection of 2 different sets. One from American Crafts and the other from Heidi Swapp. What I love about these is how girly and "springy" they look. I really like the 4x6 cards from the AC set! And I absolutely love the prompts in the "The Last List" set of 3x4 cards from Heidi Swapp! They were originally designed to be used in one of her albums, but I thought they worked perfect for PL or SMASH*.

The Last List from Heidi Swapp -----> Download Here at Heidi's Site
PL Cards from American Crafts ------> Like AC on FB for Download

I really hope you enjoyed this post and discovered some new fun printables to use in your books. I'm always adding new printables to my pinboards, so be sure to follow my "Printables/Templates" and "SMASH* & PL" boards on Pinterest to stay up-to-date on the latest ones. I'll be back again next month with a new batch of fun finds, so make sure you are following my blog too.

Wanna stay updated on my recent posts and projects? Be sure to "like" my new fan page on Facebook!

Are you a printable lover? Do you find my printable posts helpful? Any thoughts, questions, or comments? Please let me know. Your feedback is always welcome and much appreciated.

Thanks for stopping by!

Saturday, April 13, 2013

Project Life: Week 13


Week 13 was a wonderful week. It was all about Ohana. We enjoyed the company of our family that came to visit us from Portland, OR. We even celebrated Easter together. There's nothing better than sharing a Holiday with the people you love most. I even managed to squeeze in some crafting this week with some adorable handmade daybooks.

Life Documented
March 24 - 31

Week 13 - Full Spread

This week I used lots of elements from We R Memory Keepers. All of my journal cards, (the horizontal & vertical 4x6s, plus the 6x6s) came from WRMK pads that I purchased from Target. The photo pages are also by WRMK. I included lots of 4x6 photos, and the only embellishments I used were Cameo cuts. 

Week 13 - Left Page

I really love mixing up different photo page layouts throughout my album. I have both Becky Higgins and WRMK pages, and decided to use only We R Memory Keepers this week. I thought it would be nice to stick with WRMK journal cards instead of mixing in free printables like I usually do. I also managed to keep it pretty simple this week. The pictures and journal cards speak for themselves....

Week 13 - Right Page

This is a We R Memory Keepers photo page designed especially for their 6x6 journal cards. Those cards are so much fun! I love using them as a "week" card. Which is why my title card is on the right page this week instead of the usual left side. They are pretty large and give you lots of room to play around with the placement of your embellishments. The addition of the vertical 4x6 slots gave me a chance to use some of my vertical photos for the first time this year. I think all of the journal cards and photos in this page work perfectly together to document Easter Sunday :)

Are you documenting 2013 with Project Life? What are your favorite supplies to use? Any thoughts, questions, or comments? Feel free to drop me a line. Your feedback is always welcome and much appreciated!

Mahalo for stopping by!

Friday, April 12, 2013

DIY: Jewelry Organizer


I love jewelry, anything handmade, and a good DIY project. I didn't realize they could all go hand in hand! This first started out as what I thought was going to be a quick search, both in-store and online, to find a cute holder for my necklaces. Let me tell you... the search wasn't quick (I scoured so many stores and websites), and sturdy jewelry hangers are outrageously priced! I just couldn't see myself paying a ridiculous amount for something so simple. So, my internet search then went to finding inspiration for a handmade piece to hold my costume jewelry.

The internet wielded some great ideas. But I decided to try and create something spending as little money as possible, and at the same time make it look better than all of the expensive jewelry organizers I saw online and in department stores. Believe it or not, this project didn't cost me a thing. It was done using scraps and supplies I already had on hand.

Most of my DIYs are chock full of photos. I apologize that I don't have pictures of the step-by-step process for this project. I actually made these last winter [before I had a blog], and I didn't even think to take pictures while I worked. But it shouldn't be a problem for you. The directions are pretty straight forward.... and I'm here if you need help :)

HANDMADE JEWELRY ORGANIZER


TOOLS & SUPPLIES:
  • Board(s) of Wood : Cut to the dimensions you want. Lucky for me, I have a hubby who is a craftsman that works in a woodshop. The pieces I used are top-quality, sturdy hardwood blocks that were actually scraps from one of his projects at work. He cut them to size for me.
  • A Power Drill: For drilling pilot holes to screw in your cup hooks. My handy husband did this for me at work in his woodshop.
  • Fabric: Scraps work great here, if you have pieces that are large enough. You need just enough to cover the "front" and partially over the 4 sides. Remember, it doesn't need to cover the sides completely, that is what the next item is for...
  • Ribbon: It should be wide enough to cover the "edge" of the wood and long enough to completely wrap around all four sides. (Be sure to singe the ends to prevent the ribbon from fraying.) The fat ribbon I had on hand for this project, was the perfect fit to the scrap wood my hubby gave me.
  • Mod Podge: To bind the fabric to the wood.
  • Cup Hooks: They come in a variety of sizes and finishes, and can be found in the tool and hardware aisle of your local Walmart.
  • Sawtooth Picture Mounts: Gives you the ability to hang your organizer on the wall. They come in a variety of sizes and made to hold different weights. Be sure you choose accordingly. I had to purchase heavy-duty ones since I used hardwood which is pretty darn heavy. You can find these in the same aisle you found the cup hooks.
  • Picture Hooks/Hangers: Consisting of a "hook-like" piece to be used in conjunction with the accompanied tiny head nails. They also come in a variety of sizes and made to hold different weights. Choose accordingly. You will find these in the same tool and hardware aisle of your local Walmart.
  • Xacto Knife
  • Hammer
  • Sandpaper
  • Tape Measure
  • Pencil
  • Paintbrush
  • Scissors


DIRECTIONS:
  1. The first thing you need to do, if you haven't already, is cut your piece(s) of wood to the desired size. You may also want to smooth out the rough, raw edges with sandpaper.
  2. Decide how many hooks you want on your organizer. Using your tape measure and pencil, find the center (from top to bottom), then line up, measure out, and place evenly spaced "marks" on the piece(s) of wood.
  3. With your "marks" as a guide, use your power drill to make pilot holes for your cup hooks. This will make screwing the hooks in so much easier, especially if you're using a hardwood like I did. It's also handy to have these holes once your fabric is adhered to the front of the wood.
  4. Using your paintbrush, coat the "front" (the area with the holes you just made) of your wood with a layer of Mod Podge. Lay your fabric print-side down, and place your piece of wood (glue side down)  in the center of your fabric. Once the wood is in the right place, press down on it for a few seconds to give it a good bond.
  5. Carefully flip the wood and fabric over to the correct side. Rub the front of the wood to make sure the fabric is nice and smooth removing any air bubbles along the way. Let that part dry before moving on.
  6. This next step is best done in sections. Use Mod Podge to adhere the excess fabric to all four sides of the piece(s) of wood. You may need to snip the corners a little with your scissors to get the fabric to lay nice and flat. It's okay to overlap the fabric a bit at the corners.
  7. This step is also best done in sections. Once your fabric is dry, use Mod Podge to adhere your long strip of ribbon to the "sides" of the wood, wrapping it from corner to corner. Smooth out the ribbon and be sure it is straight and flush with the back edge of the wood. Allow each side to dry before moving onto the next. (I let it dry with the wet side down on a flat surface, using the weight of the wood as the pressure needed to give it a good bond, as well as keeping the ribbon flat.) At the end of this step, the only wood you should be able to see is on the back.
  8. Next, you will add your sawtooth picture mounts to the back of your organizer, one on each end. (I didn't place mine directly at the top. I went down about half an inch so my picture hangers aren't completely visible when my organizer is up on the wall.) Your tape measure will come in handy, along with a pencil. Once you know where your mounts will go, mark the holes of the mounts for easy reference. Use your hammer to nail them to the wood.
  9. Flip the holder over to the pretty side. Feel around the fabric for the holes you drilled in Step 3. Once you locate them, use the Xacto knife to poke a hole in the fabric directly over each pilot hole. 
  10. Now you should be able to easily screw in your cup hooks without ruining the fabric. The only thing left to do is attach your picture hooks to the wall so you can hang your organizer. And of course, add your jewelry. That's it...you are done! 
I do have to say that the best thing about this jewelry holder is that I made it myself... and for next to nothing! Being able to use my own fabric and ribbon, really customizing it to what I like, makes it that much better than buying something in a store or online. I also know that no one else has it, and what they do have, they spent way too much on something they could have easily made themselves.


As you can see, I made two of them. They look fabulous flanking our cabinet! I just love them and I'm so happy I didn't cave in and purchase something I wasn't completely in love with, especially at those prices!

Wanna stay updated on my recent posts and projects? Be sure to "like" my new fan page on Facebook!

I hope you like this project as much as I loved making it! I also hope to inspire you to take that risk to make something yourself (rather than going out and purchasing it), because in the end, you never know... what you made may be 100 times better, cuter, and cheaper than what you can find in a store.

Friday, April 5, 2013

Project Life: Week 12


Happy Friday Everyone! Hope you had a fabulous week! Today I'm sharing Week 12 of my 2013 Project Life Album. It's been pretty hectic at our house with the planning and packing of our vacation scheduled for tomorrow, and having out-of-town family guests over the past weekend. Unfortunately, I haven't even started on Week 13 yet :( I was hoping to have my album caught up before leaving for La Push, WA tomorrow, but that isn't going to happen. Oh well, here are some snippets of Week 12...

Life Documented
March 17 - 23


This week was full of so much love! I started out the week with fabulous snapshots of my 3 1/2 year old. Not a special day at all, I was just capturing everyday life. The highlight was my birthday, of course, which also happens to fall on the first day of Spring! My week wouldn't be complete without a weekend full of fun family time! And I end Week 12 with some birthday shopping :)


In honor of Spring, I decided to use lots of fun and colorful journal cards. All but 2 of those cards are free printables. I also included photos of all kinds. Instagram pics of various sizes, an Instax Mini 8 instant pic, and standard photos (4x3's) taken with my digital point and shoot camera.


The right side is a We R Memory Keepers photo page filled with 4x6 photos and journal cards. I included more free printables and added a Cameo cut and washi tape as simple embellishments. For some reason, I was having issues with my printer because my photos weren't printing out exactly 4" by 6". I had to figure out a way to fill that inch or so gap after securing those photos to some 4x6 cards I cut on my Cameo. Washi tape was my answer. It worked perfectly!

How are you documenting life this year? Are you a fellow Project Lifer? Any thoughts, questions, or comments about this post? Feel free to drop me a line! Your feedback is always welcome and much appreciated.

Thank you stopping by!

Monday, April 1, 2013

Handmade: Elements of a Daybook

Hello April and Happy Spring!

I absolutely adore handmade paper crafts... giving, making, and receiving them! My most favorite thing to make are Daybooks. I love everything about the whole process! They're so easy to customize and personalize. I first started making them about 8 months ago, and since then I've created around 15-20 of 'em. Some I keep for myself, but most are made for friends that I've given as a RAK (Random Act of Kindness: Sending something to someone without them knowing, and not expecting anything back in return.) Every book I make is made special for them. I use what I know about each person (favorite color, interests, etc.) to customize and personalize every book. Each and every one is "Made with Aloha."


I've gotten nothing but wonderful feedback from the recipients of each book. It makes me so happy when I hear how much it put a smile on their face, and how much they love it. The best part is knowing that something I created for them will be filled with beautiful memories to look back on for years to come...

Basic Supplies

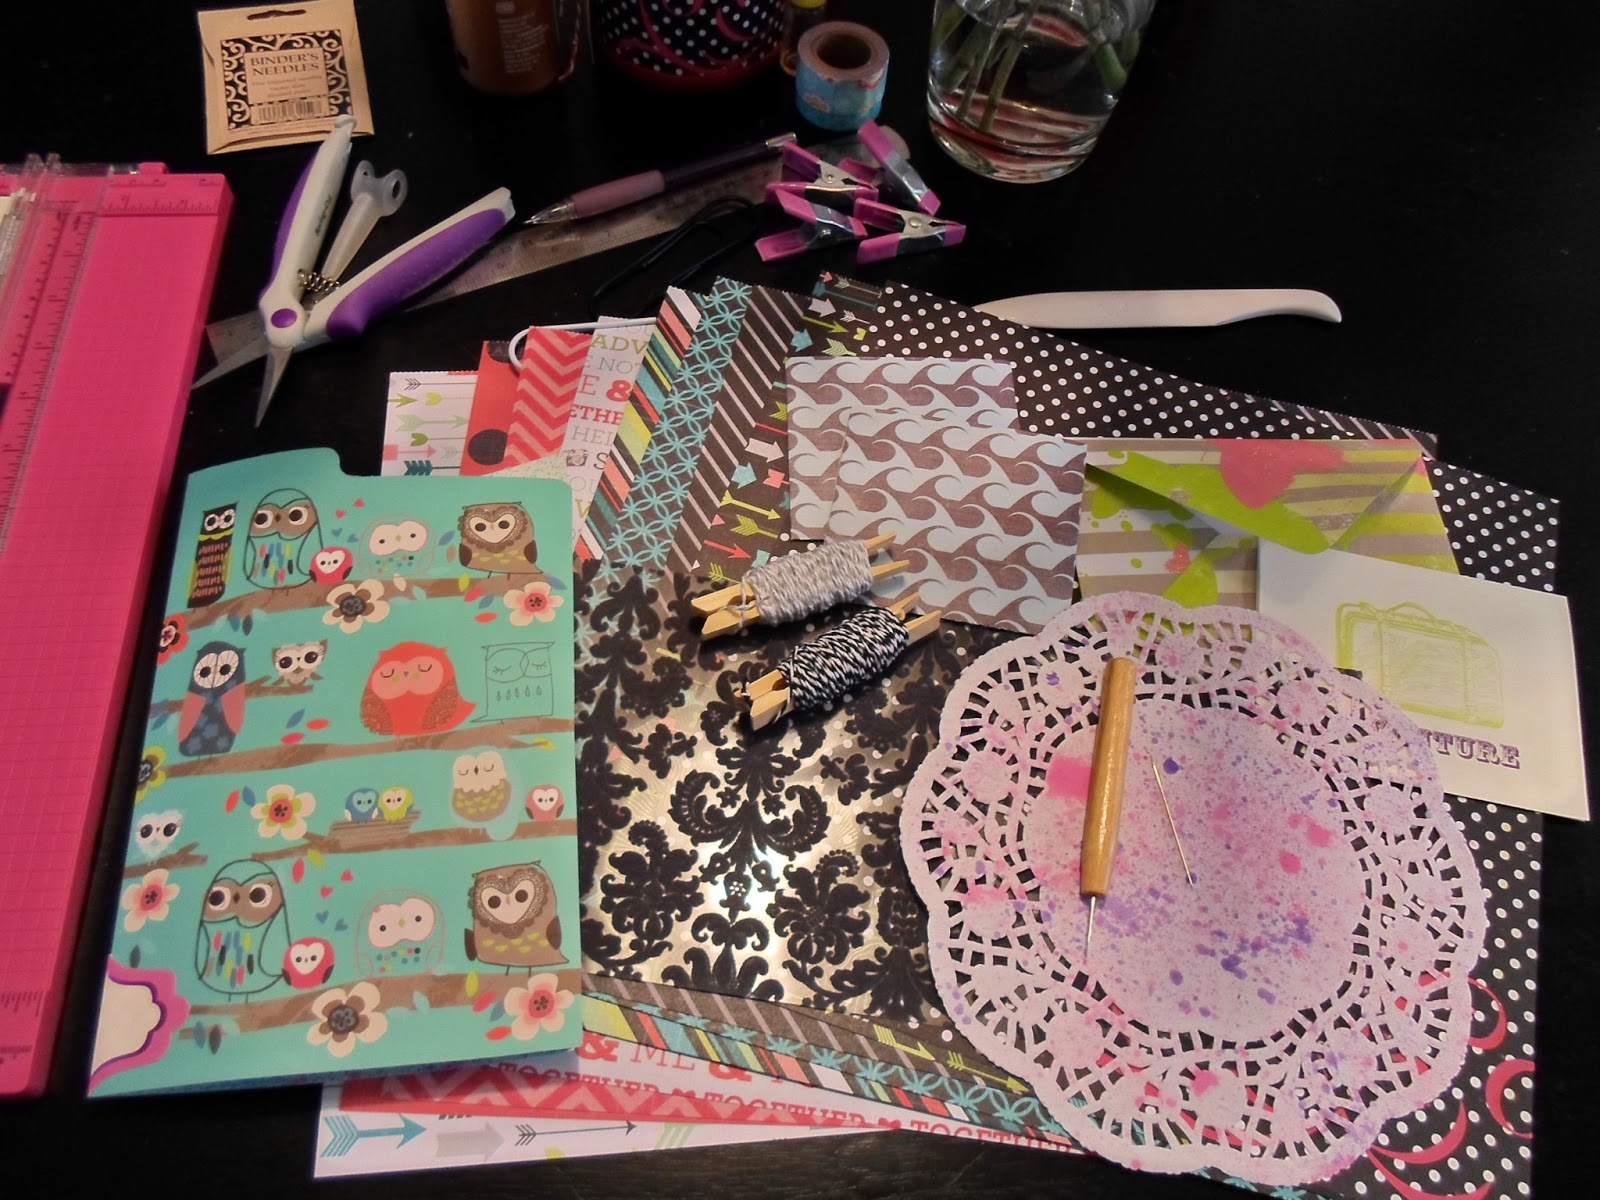
Over the last few weeks, I've gathered some new supplies to make a batch of fun and super cute daybooks. I thought I would let you take a glimpse at the process I use to make my books. From the "Supplies" & "Tools", to the "Binding" & "Sewing"... and even the extra little "Details."

Handy Tools For Making Daybooks

Really all you need to make a daybook is some pretty paper and "string" to bind it with. Over time, I've included other "Elements" that makes my books extra special. And you don't need each and every tool I've shown you here, but I think they make the process of creating a daybook much easier and faster.


One of my favorite parts of this whole process is working with all of the pretty paper. From arranging the pages to handmaking the actual envelopes and pockets, it's all so much fun! I love using double-sided scrapbook paper for the pages, and I also like to incorporate papers from different collections! As long as the colors coordinate (or even contrast), they will work great together in a book.

For these books, I picked up the main paper collection and the owl file folders at totally different times. I wasn't even thinking of  using them together when I bought them. The colors couldn't be more perfect together... I love it when it works out that way! 

I always take advantage of white spaces (like the other side of the file folders). It gives me chance to use my Homemade Glimmer Mists and/or Alcohol Ink Sprays. I really love adding handmade {scrapbook paper} envelopes, delicate doilies, and designer notecards. This is also a great way to use up your paper scraps! Daybooks with pages of various shapes and sizes are so fun to flip through....


TIP: Use templates! They are incredibly handy and worth making. I have all kinds of different templates in my collection that I use for various paper projects.


Poking Holes: Prepping the book for Hand-Stitching

At first, I definitely thought that hand-sewing the binding was the hardest thing about all of this. But now, it's so easy because I've had lots of practice from making so many books. Practice makes perfect! I love seeing that stitching come out nice and straight!


Another part I like to personalize is the binding... choosing the perfect twine or cord and adding a cute little charm.

Confetti Pages are so Fun!

One of the funnest "elements" I add to my books are confetti pages. They hold anything... photos, diecuts, paper ephemera, and other kinds of memorabilia. Best thing about them... they make great use of items you would normally throw away, like the "punchies" from your craft punches and the cellophane packaging that comes with your favorite stickers and embellishments! A wonderful way to "Reduce" and "Reuse."

It's All About The Details.....

The Finishing Touches: A border punch across the edges of a few pages is a wonderful touch. I love using my "Scroll" punch for this project! [Handmade] Pockets on both the front and back covers gives the recipient a nice place to hold journal cards or ephemera. I like using my own stamps and washi tape on the other "half" of the pretty notecards. It's a really great way to add a creative touch to an otherwise blank page.


I really hope you enjoyed this post. I had tons of fun writing it and I'm going to have even more fun RAKing two of my new daybooks to a couple of special ladies! I don't know what's better...making them or giving them away ;) Do you make your own daybooks too? If so, what's your favorite part of the process? Any questions, thoughts, or comments? Please let me know. Your feedback is always welcome and much appreciated!

Wanna stay updated on my recent posts and projects? Be sure to "like" my new fan page on Facebook!

Thank you for stopping by!
Related Posts Plugin for WordPress, Blogger...
Pin It button on image hover